You can spend 20 minutes babysitting boiling water, or you can have sweet, buttery corn in less time than it takes to scroll TikTok. This isn’t a recipe; it’s a strategy for winning dinner with zero sweat. Think juicy, pop-off-the-cob kernels and a flavor that feels like a backyard cookout—without firing up the grill.
If you’ve got an Instant Pot and a craving, you’re about to retire your stockpot. Ready to flex on soggy, overcooked corn forever?
What Makes This Special
This method nails the sweet spot: speed, flavor, and texture. Pressure steaming keeps the kernels crisp-tender and intensely juicy, not waterlogged like boiling.
It’s practically hands-off, so you can season, press start, and move on with your life.
Bonus: you can cook an entire family’s worth of corn at once. And if you’re team “butter bath,” the Instant Pot makes that optional upgrade ridiculously easy. Weeknight win, cookout cheat code, late-night snack—it checks every box.
What Goes Into This Recipe – Ingredients
- 4–8 ears corn on the cob, husks and silks removed (trim ends if needed to fit)
- 1 cup water (6-quart Instant Pot) or 1.5 cups water (8-quart Instant Pot)
- 2–4 tablespoons unsalted butter (optional, for serving or butter bath)
- Salt (kosher or sea salt), to taste
- Freshly ground black pepper, to taste
- Optional toppers: lime wedges, chili powder, Tajín, paprika, parmesan, cotija, chopped cilantro, garlic powder, hot honey, or everything bagel seasoning
The Method – Instructions
- Prep the pot: Place the metal trivet or steamer basket in the Instant Pot.
Pour in the water—1 cup for 6-quart, 1.5 cups for 8-quart.
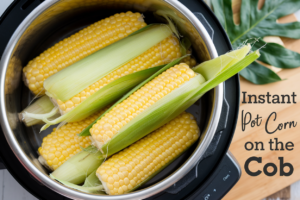
- Load the corn: Arrange the ears horizontally on the trivet. Stack in a crisscross pattern if needed. Don’t force the lid; trim ends to fit.
- Pressure cook: Seal the lid and set the valve to Sealing.
Cook on High Pressure for 2 minutes for crisp-tender or 3 minutes for softer kernels. (Very large ears? Do 4 minutes.)
- Quick release: When it finishes, immediately quick release the pressure to prevent overcooking. Steam is hot—use a utensil to flip the valve.
- Butter bath option: Drain the water, return corn to the pot, add 2–4 tablespoons butter and a pinch of salt.
Close the lid (no pressure) for 1–2 minutes on Keep Warm to melt and coat.
- Season like you mean it: Sprinkle with salt and pepper. Add your favorite toppings (see ideas below). Serve hot.
- For big batches: After the first round, keep cooked corn on a warm platter covered with a towel while you repeat.
No one will know it wasn’t all done at once.
How to Store
- Refrigerate: Cool completely, then wrap ears in foil or place in an airtight container. Keep up to 4 days.
- Freeze kernels: Cut off kernels and spread on a sheet pan to freeze, then bag. Keeps 3 months.
Great for chowders, salads, and quick sautés.
- Reheat: Microwave ears wrapped in damp paper towels for 60–90 seconds. Or steam in Instant Pot for 0 minutes (yes, zero—it heats during pressurization) with quick release.
Why This is Good for You
Corn is loaded with fiber for digestion and satiety, plus B vitamins that support energy. The yellow color?
That’s lutein and zeaxanthin, antioxidants that love your eyes as much as you love summer.
Cooking under pressure preserves nutrients better than boiling because you’re not leaching them into a giant pot of water. Keep the butter modest and you’ve got a naturally sweet, whole-food side that still tastes like a splurge. FYI: it’s also naturally gluten-free.
Don’t Make These Errors
- Overcooking the corn: Anything past 4 minutes turns juicy kernels into mushy regrets.
Stick to 2–3 minutes and quick release.
- Skipping the trivet: Direct contact with water leads to waterlogged corn. Use the trivet or a steamer basket.
- Forgetting the water measurement: Too little = burn warning. Too much = soggy results.
Use 1 cup (6-qt) or 1.5 cups (8-qt).
- Letting it sit on Keep Warm under pressure: It will continue cooking and get soft. Release pressure immediately.
- Seasoning after it’s cold: Salt and butter cling better when the corn is hot. Don’t wait.
Different Ways to Make This
- Elote-style (Mexican street corn): Slather hot ears with mayo or crema, sprinkle with chili powder, cotija, and cilantro, then finish with lime.
Ridiculously good.
- Garlic-parm upgrade: Toss with melted butter, grated parmesan, garlic powder, and black pepper. Add parsley if you’re feeling fancy.
- Smoky BBQ rub: Brush with butter, dust with your favorite BBQ seasoning, and hit with a squeeze of lemon. Sweet + smoky = chef’s kiss.
- Hot honey heat: Drizzle with hot honey, add a pinch of salt and red pepper flakes.
Sweet heat that doesn’t quit.
- Herb-lime freshness: Butter, lime zest, and chopped basil or dill. Clean, bright, and backyard-ready.
- Off-the-cob salad: Cut kernels and toss with cherry tomatoes, avocado, feta, lime, and olive oil. Summer in a bowl, IMO.
FAQ
Do I need to remove the husks?
Yes.
Husk and silk removal is best for even steaming and easier eating. If you’re in a rush, you can steam with husks on for the same time, then peel carefully after cooking—just expect a little extra mess.
How many ears can I cook at once?
As many as fit below the max fill line while sitting on the trivet—usually 6–8 in a 6-quart, a bit more in an 8-quart. Stack them crisscrossed so steam can move around.
Can I use frozen corn on the cob?
Yes.
Add 1 extra minute to the cook time (so 3–4 minutes total) and quick release. No need to thaw first.
What if I want really soft, kid-friendly corn?
Go for 3–4 minutes on High with quick release. It’ll be tender without turning into baby food.
Can I flavor the water?
Absolutely.
Add a smashed garlic clove, a bay leaf, or a few lemon slices. Sub in a cup of broth for a savory baseline. The corn won’t absorb tons, but it adds a subtle boost.
Is butter necessary?
Nope.
It’s delicious, but olive oil, lime juice, chili-lime seasoning, or a sprinkle of smoked salt also slap. Your call, your macros.
Why quick release instead of natural release?
Corn continues to cook during natural release, which leads to mushy texture. Quick release stops the process right away and keeps the kernels snappy.
How do I cut the kernels safely?
Stand the ear upright in the center of a bundt pan or inside a large bowl and slice downward with a sharp knife.
The pan catches the kernels so they don’t go rogue across your kitchen.
Can I double this for a party?
Yes, and the cook time stays the same. The Instant Pot will just take longer to come to pressure. Keep finished corn covered with foil or a towel while you cycle batches.
What’s the best salt for finishing?
Kosher salt for even coverage, flaky sea salt for a fancy crunch.
Both make the sweetness pop. Add a grind of black pepper and call it a day.
Final Thoughts
Instant Pot Corn on the Cob is the side dish that respects your time and hits every nostalgia button. Two to three minutes of pressure, a quick release, and you’re in buttery, golden territory—no boiling cauldrons, no babysitting.
Keep it classic with salt and butter or dress it up with chili, lime, and cheese. Either way, it’s the kind of low-effort, high-reward move that makes you look like you planned ahead. Spoiler: you didn’t need to.
Printable Recipe Card
Want just the essential recipe details without scrolling through the article? Get our printable recipe card with just the ingredients and instructions.
Printable Recipe Card
Want just the essential recipe details without scrolling through the article? Get our printable recipe card with just the ingredients and instructions.